Showing posts with label OPI Pink Flamenco. Show all posts

Monday, 30 July 2012

KKCenterHK Water Decal Review

Hello everyone :)
Today I have another review for KKCenterHK nail art water decals. This time when I was contacted by the company I choose some super cute water decals with cats on! Here's the link to them: http://www.kkcenterhk.com/p5209/N.NAIL-Water-Decals-Nail-Art-WDBLE927/product_info.html

I decided to use them with a complimentary colour that matched the decals...
 For these nails I used one coat of OPI Pink Flamenco as the base colour. This pink is super bright and such a beautiful colour for summer, and with it only taking one coat what's not to love about it? :P I then used one coat of OPI I Lily Love You over the top. This glitter/flakie polish was what started my polish obsession, it was my first OPI polish and I instantly fell in love :)
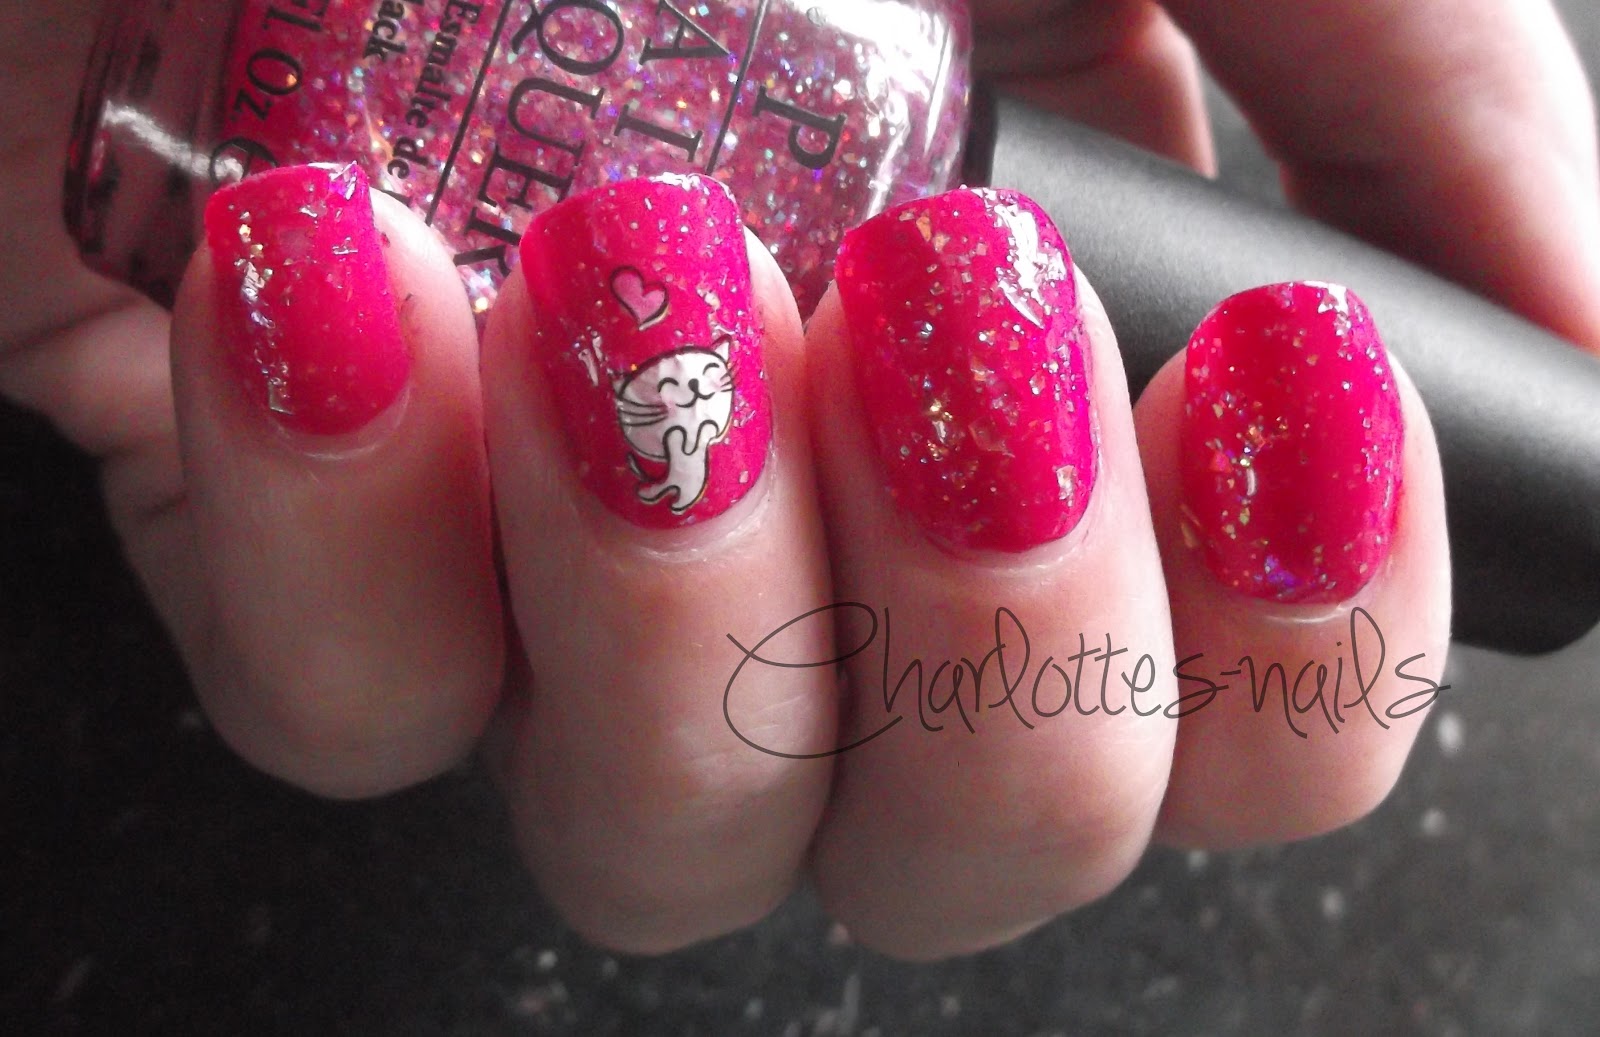
The water decals are so simple and easy to apply to the nail. The decals come in one sheet, the sheet contains twenty decals and they are priced at $2.82, which obviously is a great price. I cut out the decal I wanted to use from the sheet and removed the plastic from the top, I then run some water over the decal for a few seconds. This allows the decal to slide away from the backing and then I place it onto my nail in the required position and seal with topcoat. the whole process takes about thirty seconds. These decals are great to spice up a regular mani or just to use if you want something quick and easy.

KKCenterHK offer a wide variety of nail art products as well as fake eyelashes and other stuff, check out their website, it's amazing! Also, don't forget about the 10% off discount code if you order, just enter: charlottes-nails at the checkout :)

Thanks for reading,


Monday, 25 June 2012

Summer Fun Challenge - Summer Lovin'

Hello everyone :)
Today I have my second post for the Summer Fun Challenge! Today's post is based on the theme of Summer Lovin'. As soon as I saw this theme I knew exactly what I wanted to do but had no idea to do it, so I played around for a while and came up with something I loved! here's what I came up with...
I've wanted to try out some nail art using naked nail as well as polish, so I thought this was the perfect time to do it! I was originally going to use lighter colours but thought you wouldn't be able to see my naked nail pop as much as you would with a brighter colour. Plus hot pink just screams summer at me :P
For these nails I used two coats of OPI Pink Flamenco, although I could have gotten away with one. This is my favourite hot pink polish, it applies like butter and it looks gorgeous! I then used a nail art brush and pure acetone to remove some of the polish to create the naked hearts on my nails, surprisingly this took quite a bit of time. Probably because I'm a perfectionist and wanted my hearts to be perfect :P
 I really love how this looks on my nails. It's quite a subtle effect but everyone who saw these kept asking me how I did it :P I think it'd be fun to use this method for other shapes or patterns and obviously in different colours. I can't wait to play around with this a bit more :)

Have you ever done nail art with sections of naked nails? Let me know in the comments :)
Thanks for reading :)


Sunday, 22 April 2012

April Showers Challenge - Butterflies

Hello everyone :)
I have another April Showers challenge post for you today... Butterflies! I've been dying to do butterfly nails for a long time and never got round to it so I was so excited to see it in this challenge! I've been looking around online and seen some beautiful butterfly nails, so here's how mine turned out...
I think these turned out quite well for saying it was my first go! My boyfriend had no clue what they were when I showed him but my son knew straight away :P My inspiration for these nails was a monarch butterfly, even though they're orange and not pink :P
For these nails I used two coats of OPI Pink Flamenco, I could have gotten away with one coat if I was more careful. This is such a vibrant pink polish, I've fallen in love with it! :) I then used my Models Own Nail Art Pen in black to draw the lines and used a dotting tool and OPI Alpine Snow to create the dots.
I'm so pleased with how vibrant and cute these turned out :) Again, this is one of those kinds of nail art that is very versatile depending on the colour combination. I'd love to try this over a sponged base.

Have you tried butterfly nails? What colours would you use with this nail art? let me know in the comments :)
Keep an eye out for my 250 follower giveaway tomorrow! :D
Thanks for reading :)
Charlotte xxx

Monday, 16 April 2012

Week 16 Dotticure Mani

Hello everyone :)
Today I have week 16 of the 52 Week Challenge. This weeks theme was a dotticure mani, and I knew straight away what I was going to do. Over the past few weeks I've seen a few posts on some dotty nails and I loved the look of them and was dying to try them out. I thought I'd wait and save them for this weeks theme, here's what I came up with...
I dotted over the top of yesterdays Ombre nails seeing as I loved them too much to take off just yet :P I created the dots using several different sizes of dotting tools.
I used OPI Alpine Snow, OPI Pink Friday and OPI Pink Flamenco to create the dots, as well as the Gradient which you can read more about in my previous post :)
I really love how this turned out. I used to hate doing nails with polka dots, but now that I have proper dotting tools it is definitely much easier and one of my favourite techniques for nail art. I will be trying this again  with different colours schemes, it's another very versatile way to do nail art.

Do you like using polka dots in nail art? Let me know in the comments :) Also let me know what kind of polishes you'd like to see included in my 250 follower giveaway as I'm going shopping very soon ;)

Thanks for reading :)
Charlotte xxx

Sunday, 15 April 2012

April Showers Challenge - Ombre

Hello everyone :)
Today I have another April Showers Challenge post for you. This challenge was Ombre! I've only ever done ombre before and I did it with green polishes. My last ombre was a different shade of green polish on each finger, so this time I decided I'd do a gradient ombre on each finger to make it a bit different from my last attempt.
I was originally going to a different coloured ombre on each finger but I thought that would be too distracting and you wouldn't know where to look. So I just went with pink as it's one of my favourite colours and very pretty for spring :)
I started by painting two coats of OPI Alpine Snow onto all my nails as a base colour to sponge over. I then sponged one thin coat of OPI Pink Friday to the bottom half of my nails. I then topped this with one thin coat of OPI Pink Flamenco to the top half of my nail. I sponged in the middle while the polish was still wet to make the colours blend together a bit better. I then topped it all off with a coat of Wet N Wild Hallucinate to add some sparkle to it :)
These nails are very versatile, just like all the nails I've done recently. You can change the colour scheme so that they're suitable for all occasions, I really want to try this with nudes and glitter, I think they'd be beautiful :)

Have you tried an ombre/gradient mani recently? What techniques and colours do you use? let me know in the comments :)
Thanks for reading :)
Charlotte xxx

LinkWithin

Related Posts Plugin for WordPress, Blogger...